ApiKey that has access to your entire App on MoonKey.
1 - Implement Wallet Login UI
In this example, we will be using MetaMask; however, since all of MoonKey platform is API first, we are compatible with any wallet that can sign a message. Here is the login flow we are trying to achieve where user will- Log in
- Connect and verify wallet address
- Use app or dApp
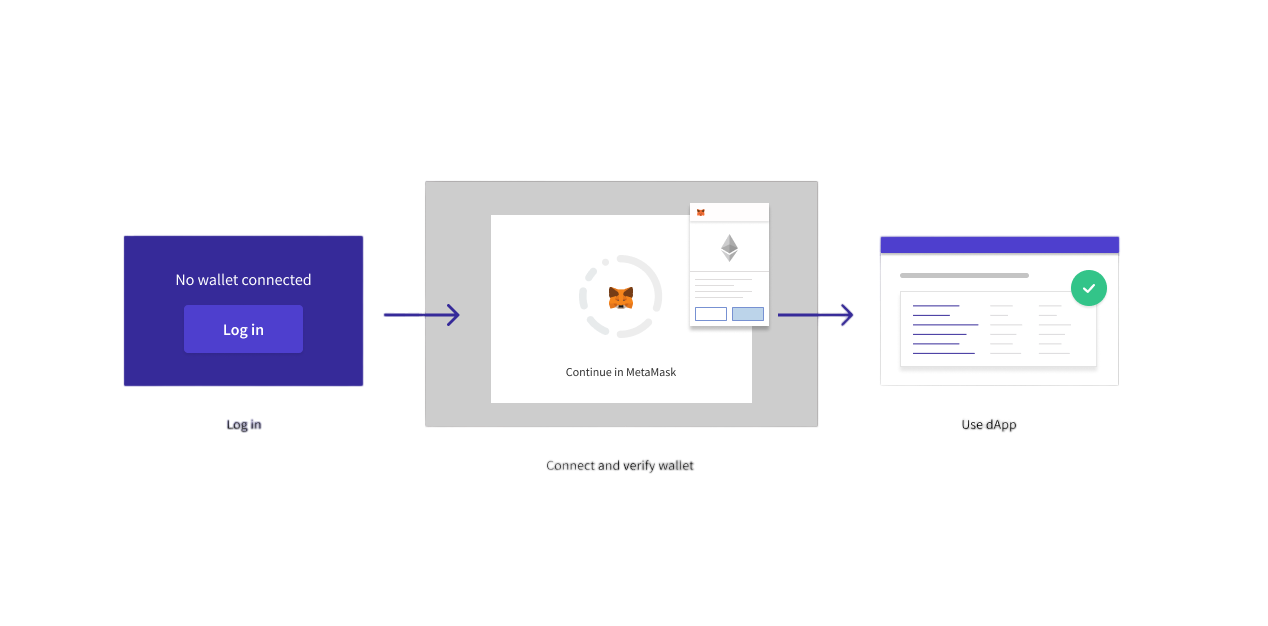
Metamask login flow

Metamask Button UI
2 - Retrieve Wallet Address from MetaMask
Since most Ethereum users depend on MetaMask, the easiest way to retrieve the the Ethereum wallet address is via MetaMask. You can also easily check if your user has MetaMask installed by callingwindow.ethereum and ensuring that it is not undefined. If MetaMask is not installed, the many live codeblocks throughout this guide will not work.
Live Example of Retrieving Wallet Address from MetaMask
Click on theConnect button to initiate a MetaMask connection and retrieve your wallet address.
Javascript
3 - Register user or sign in user
Each user must be stored on MoonKey Auth, so we recommend ensuring that you store our auto generated user ID from the response into your database/backend in a column or field against that user (as long as you can associate your user with the auto generated ID returned by MoonKey). We will ensure that each wallet address is ONLY attached to a single user at any time. We will be using the BeginWalletRegistration where if a user ID is sent in, we will associate it with the user if it is not already associated with another user. Otherwise, a new user will be created on the fly (aka JIT, Just in time).cURL
challenge that must be signed by the wallet private key associated with the public address you are intending to register. You can use this single endpoint to handle both registration and sign in since as long as the same user ID is associated with the wallet address, you can treat it as a LoginOrCreateUser endpoint for ethereum wallet address.
JSON
4 - Sign Wallet Challenge Message
In the previous step, MoonKey will return achallenge for you to sign and user_id associated with the wallet address. If it is a new user, we recommend that you attach the user_id to your own user in your database.
JSON
Javascript
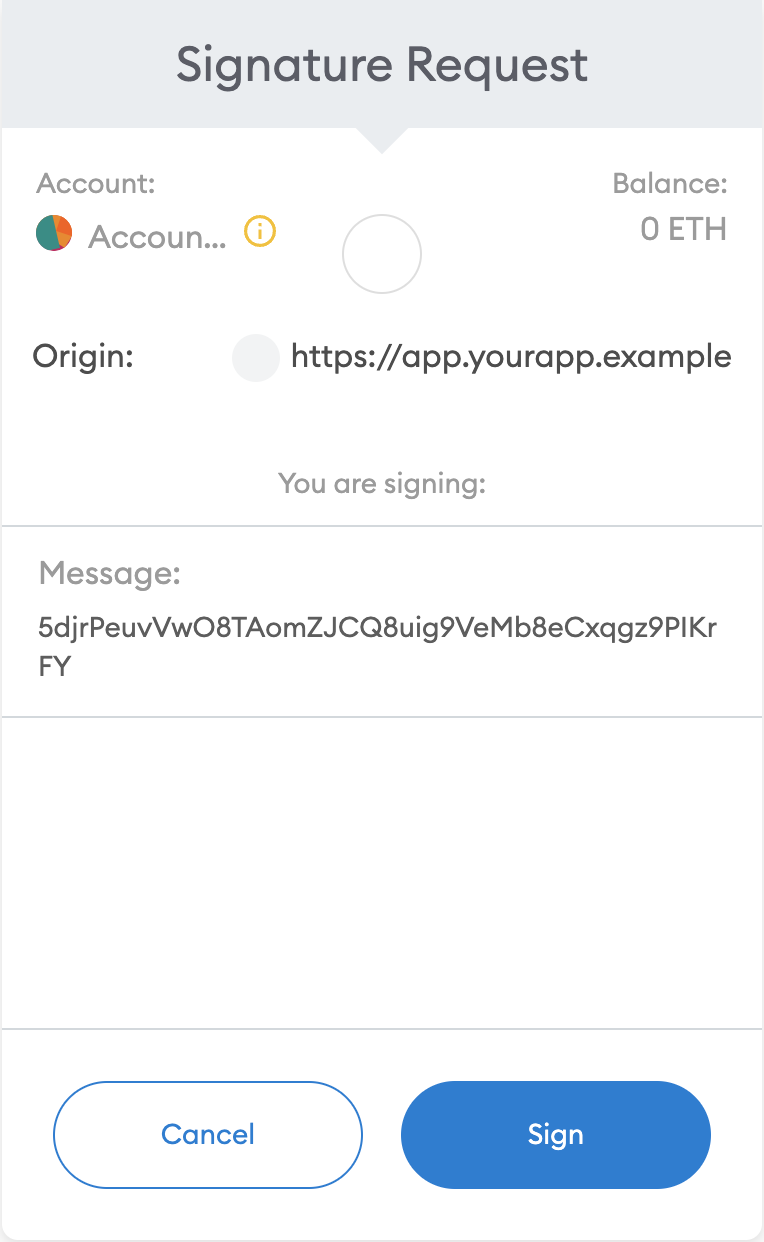
Signature Request
To begin development with our API without building your own MetaMask integration, you can use
mycrypto.com to easily trigger a MetaMask signing of your challenge here, choose MetaMask, then paste in the challenge. Once signed by MetaMask, use the sig field in the JSON to continue with this tutorial. For your convenience, you can also use our live codeblock below and simply replace the message with your own challenge message.Full Live Example of Login to MetaMask with Message Signing
Javascript
5 - Verify Wallet Registration
Once you have signed yourchallenge, you need to send the signature, wallet_type, and the public_address of the wallet you are verifying to the VerifyWalletRegistration endpoint.
cURL
JSON
session_expires_in parameter like the following.
cURL
session object with session_token and session_jwt like the following response. Your can read more about Session management here on how to leverage MoonKey’s Session management for multifactor authentication flow.
JSON
JSON